There are times when your photo needs a little boost to brighten up flat lighting and colors. Today we'll go over a quick way to get those images to POP!
Click on any image to enlarge it.
- Here is my original image.

- And here is the same image after using a Curves Adjustment Layer to POP the colors!

- Open your image in Photoshop. Change the color mode to Lab Color (Image Menu>Mode>Lab Color). You will see why this is important when we open our Curves dialog box. Instead of Red, Green, and Blue channels (as in RGB mode) you will have Lightness, "a" and "b" channels to work with.

- Create a New Adjustment Layer by clicking on the Adjustment Layer Icon at the bottom of the Layers Palette.


- Press and hold down the Option Key (Mac) or the Alt Key (PC) and click once on the Curves grid to make the grid smaller.
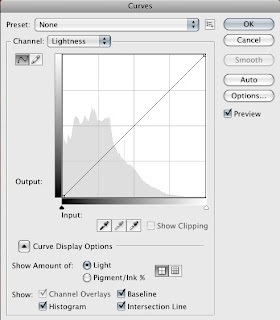
- From the Channel menu choose the "a" channel. Click and drag the top point at the curve one box to the left. Then click and drag the bottom point at the curve one box to the right.


- Now choose the "b" channel and do the same thing here.
- Click OK to close your Curves dialog box and see the results from your adjustments. You can always go back to your Curves dialog box to increase or decrease your adjustments by clicking on the Curves Adjustment Layer in your Layers Palette.


No comments:
Post a Comment