As a fine-art photographer for the past nineteen years I've come up against my fair share of
technological challenges in photography. The shift from film to digital was monumental!
In this blog I'd like to share with you what I've found to be some of the most useful PhotoShop
techniques when working with my digital images. I hope that they will make your life a bit easier
as you work with your images. Have fun!

Welcome to my "Photoshop Tips for Photographers" Blog

Please Note: These tips have been prepared using Photoshop CS3.

Sunday, February 28, 2010

Week #9: Painting a Black/White Image with Selective Color


This is my favorite way to quickly add color to a black and white image: (click any images to enlarge)
  1. First, open your image and convert it to black and white if it isn't already converted.
  2. To convert to black and white see my PS Tips Blog Week #5: Quick Conversion to BW, or you can use a Black and White Adjustment Layer to convert. Click on the Adjustment Layer icon at the bottom of the Layers Palette dialog box.
  3. Make sure your new Adjustment Layer is selected in the Layers Palette. Next, simply paint the color back into the areas you wish. Choose a brush from the brush palette (hit B on your keyboard to change to the brush tool). Make sure you are painting with a BLACK brush (choose black for your foreground color) on the areas that you want to REVEAL the color.
  4. If you go over the lines of an area that you are painting (in other words, if you mess up!) simply paint with a WHITE brush. (Change the foreground color to white by hitting the X on your keyboard). Now you can erase the areas where you went over the lines.
  5. That's it! With a little practice and experimentation with brush sizes and opacity you will be able to create your masterpiece! 

Monday, February 22, 2010

Week #8 - Add a Photo Frame to your image


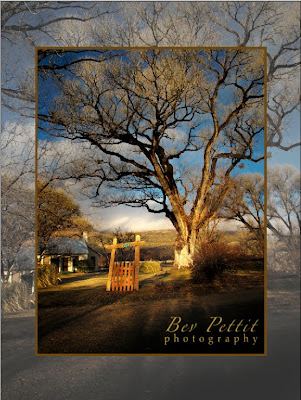
This is a fun way to add a frame or border to your image while using the same photo.

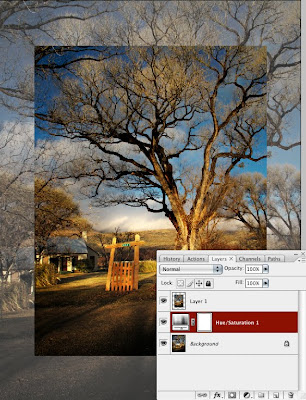
1. First, open your image and duplicate the background layer in your Layers Palette. (Command-J on a Mac, Control-J on a PC)

2. With the duplicate layer selected, press Command or Control-T, or go to Edit>Free Transform menu. Option-Shift-Click (Mac) Alt-Shift-Click (PC) to constrain proportions and keep your image centered, then drag a corner handle toward the center. Press Return/Enter when you have the image sized as you like.

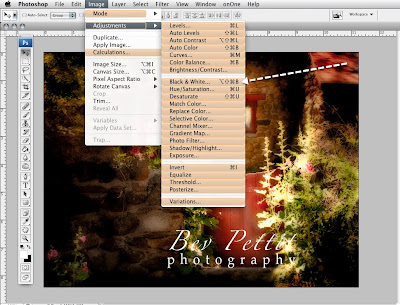
3. Select the Background Layer. Add a New Adjustment Layer (bottom of Layers Palette). Make the new layer a Hue/Saturation Layer. Lower the Saturation and increase the Lightness. You can watch the effects as you change the sliders on your image.

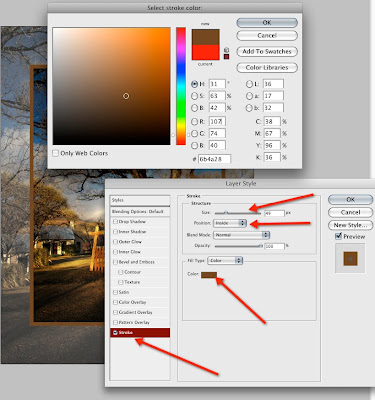
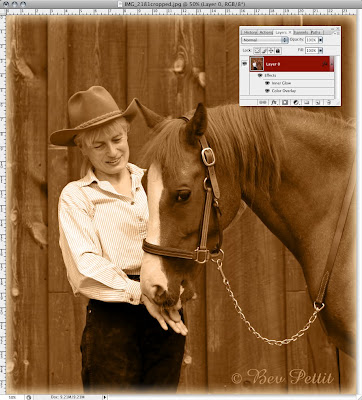
4. Select the layer of the scaled down image and Add a Layer Style (click the effects, "fx", symbol at the bottom of the Layers Palette). Choose Stroke from the effects pop up menu. Once the Layer Style dialog box is open you can create your edge around the smaller image. Click on the color swatch and choose a color. Hover over the image with your cursor until you see the eyedropper tool. Then click on a Color in the image that you would like for the border. Make sure that the Position is set to Inside. Increase the Size (width) of the line to what you'd like.


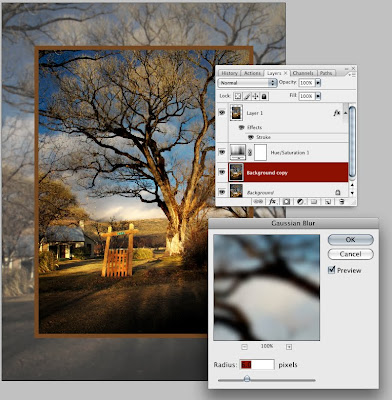
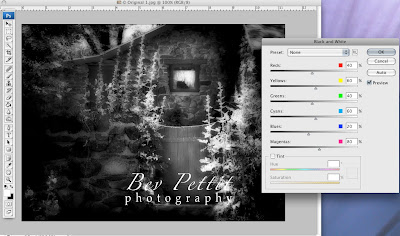
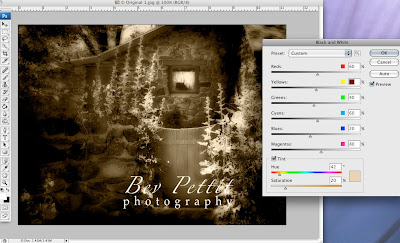
5. Variations of this technique can be applied by choosing different Filters from the Filter menu. While leaving everything as you've already done, duplicate your Background Layer. Then simply go up to the Filter menu and experiment with different effects that you get from the various filters. Here are three that I tried using the Gaussian Blur, Glow Edge and Mosaic Tile filters. You can try many more!

Monday, February 15, 2010

Week 7 - Lighting Effect using a Curves Adjustment Layer

This simple lighting effect can be created in just a couple of easy steps.

Here is the original image that we will work on today.

First, click on the Create a New Adjustment Layer icon at the bottom of the Layers Palette. Add a Curves Adjustment Layer. Click on the top right point of the curve and drag it down the right side until you reach an Output number of around 70 or 80.


Second, choose a very large soft Brush (press B on your keyboard to select a brush). Be sure that your Foreground is set to black. Set the Opacity of the brush to 60%. Click once on the image where you would like to add your lighting. For instance, I made my brush large enough to cover the horses' eye and face and clicked there. Then lower your brush opacity to around 20%, move your brush tool to another spot, somewhere away from the first lighting effect, and click again. Keep clicking until you have the amount of light that you'd like. I clicked four times with the 20% brush after my first click with the 60% brush.

Here's the final image after adding the Curves Adjustment Layer and the five clicks with a large soft brush. Have fun!

Monday, February 8, 2010

Photo Shop Tip #6 - Layer Styles: Another easy way to Tint and image and add a Glow Vignette


This week we're going to add a sepia tint and a glow border to your image in just a few easy steps using Layer Styles.

First, duplicate your original image. (Image>Duplicate) Double-click your background layer to unlock it so that you can add effects.

Next we're going to add layer styles to your background layer beginning with a Color Overlay.

Step 1: At the bottom of your Layers Palette click on the "fx" icon, second from the left, to bring up the Layers Styles. Choose Color Overlay. Change the Blend Mode pop-up to Color. Click on the color swatch and choose a color. In this case I chose a brownish tone of H:30, S:75, B:50. You can also lower the opacity slider a little bit if you like. I lowered mine to 90%.


Step 2: Next we want to add an Inner Glow Layer Style for a soft vignette around the edge of the image. While still in the Layer Style dialog box, choose Inner Glow from the options on the left-hand side. Click on the Color Swatch and type in the same Hue setting (H:30) in the Color Picker as we did in Step 1. Play with different saturation and brightness settings until you find one that you like. After you click OK in the color picker, adjust the Size Slider to control the size of your vignette.


Monday, February 1, 2010

Week 5: Quick Conversion to Black & White or Tones


Open and Image. Choose Image>Adjustments>Black and White.


You will now have a black and white image. To adjust the intensity of the black and white tones move the color sliders back and forth under Custom Preset. Look at your image to see how the sliders affect it as you move them.


Next, change the Custom Preset to one of the Filter choices from the Preset Drop Down Menu. See how each affects your image differently.
After deciding on a Custom or Filter Preset you can use the color sliders to fine-tune your shading. Or you can hold your cursor over the image (cursor looks like an eyedropper) and then click and drag on the different areas of the image that you want to make darker or lighter. Dragging left makes them lighter and dragging right makes them darker.

If you want to color tone your image to sepia, or blue, or magenta, etc., simply check the Tint Box at the lower left corner of the BW dialog box. Then move the hue and saturation sliders back and forth to choose a tone.