This simple lighting effect can be created in just a couple of easy steps.
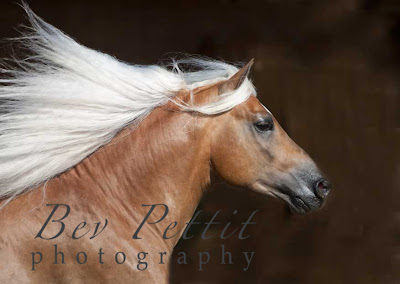
Here is the original image that we will work on today.

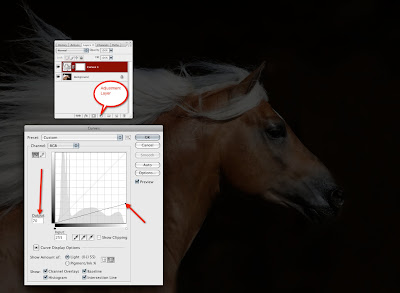
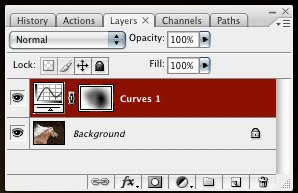
First, click on the Create a New Adjustment Layer icon at the bottom of the Layers Palette. Add a Curves Adjustment Layer. Click on the top right point of the curve and drag it down the right side until you reach an Output number of around 70 or 80.


Second, choose a very large soft Brush (press B on your keyboard to select a brush). Be sure that your Foreground is set to black. Set the Opacity of the brush to 60%. Click once on the image where you would like to add your lighting. For instance, I made my brush large enough to cover the horses' eye and face and clicked there. Then lower your brush opacity to around 20%, move your brush tool to another spot, somewhere away from the first lighting effect, and click again. Keep clicking until you have the amount of light that you'd like. I clicked four times with the 20% brush after my first click with the 60% brush.
Here's the final image after adding the Curves Adjustment Layer and the five clicks with a large soft brush. Have fun!

No comments:
Post a Comment