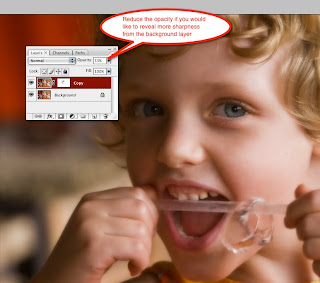
- Open your image and press Command-J (PC: Ctrl-J) to duplicate the Background layer. Click on the Filter Menu and choose Blur>Gaussian Blur. Set the pixel radius setting to how much blur you would like. We are going to paint back in the areas that you want less blurred. So if you want the background really blurred out a lot then go for a higher radius. This may be something that you'd want to experiment with depending on your image and the effect you want to gain.


- Click OK after you have set your radius.
- Your photo will now look blurry all over. You can also drop the opacity of your blurred layer down to around 50% or 60% if you want to reveal more from the sharp background layer below.

- Next, you will create a Layer Mask on your blur layer. Click on the Layer Mask icon at the bottom of the Layers Palette. Then choose a soft brush and begin painting. Make sure that your foreground color is Black to reveal the sharpness. If you'd like to go back and erase what you have done (making parts of the image more blurred again) simply change your foreground color to White and paint over.


- Play around with all of these settings for different effects and different levels of blur. It can be a lot of fun!
As a fine-art photographer for the past nineteen years I've come up against my fair share of
technological challenges in photography. The shift from film to digital was monumental!
In this blog I'd like to share with you what I've found to be some of the most useful PhotoShop
techniques when working with my digital images. I hope that they will make your life a bit easier
as you work with your images. Have fun!
Welcome to my "Photoshop Tips for Photographers" Blog
Please Note: These tips have been prepared using Photoshop CS3.
Sunday, March 7, 2010
Blur the Background
Subscribe to:
Post Comments (Atom)

Bev,
ReplyDeleteThanks so much for all your Photoshop tips! Love them!!!