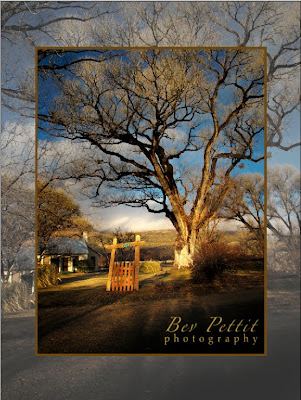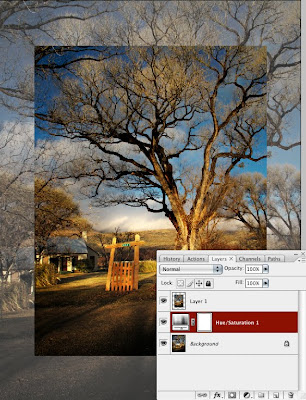
1. First, open your image and duplicate the background layer in your Layers Palette. (Command-J on a Mac, Control-J on a PC)
2. With the duplicate layer selected, press Command or Control-T, or go to Edit>Free Transform menu. Option-Shift-Click (Mac) Alt-Shift-Click (PC) to constrain proportions and keep your image centered, then drag a corner handle toward the center. Press Return/Enter when you have the image sized as you like.
3. Select the Background Layer. Add a New Adjustment Layer (bottom of Layers Palette). Make the new layer a Hue/Saturation Layer. Lower the Saturation and increase the Lightness. You can watch the effects as you change the sliders on your image.

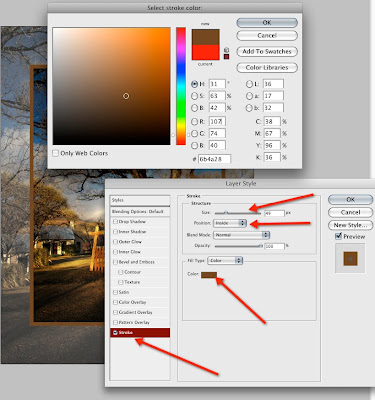
4. Select the layer of the scaled down image and Add a Layer Style (click the effects, "fx", symbol at the bottom of the Layers Palette). Choose Stroke from the effects pop up menu. Once the Layer Style dialog box is open you can create your edge around the smaller image. Click on the color swatch and choose a color. Hover over the image with your cursor until you see the eyedropper tool. Then click on a Color in the image that you would like for the border. Make sure that the Position is set to Inside. Increase the Size (width) of the line to what you'd like.

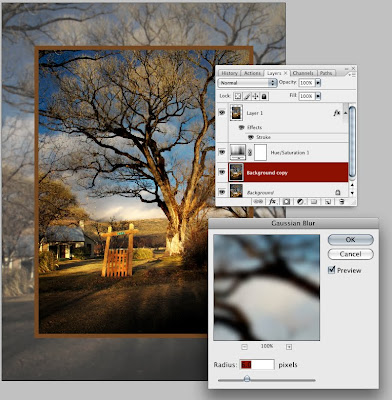
5. Variations of this technique can be applied by choosing different Filters from the Filter menu. While leaving everything as you've already done, duplicate your Background Layer. Then simply go up to the Filter menu and experiment with different effects that you get from the various filters. Here are three that I tried using the Gaussian Blur, Glow Edge and Mosaic Tile filters. You can try many more!


No comments:
Post a Comment