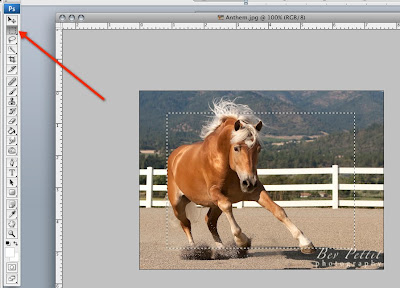
Open a new image file in Photoshop. Open your Layers Palette (Window menu>Layers) and duplicate your Background Layer. With the new duplicated layer chosen draw a rectangle around the outside edge of your image using the Rectangle Marquee tool.

With the rectangle still selected, go to the Select Menu and choose Modify>Feather. Pick a feather radius and type the number into the pixel box. Somewhere around 80-100 is a good radius to start with. Click OK.
Then go to the Select Menu again and choose Inverse. You will now see two rows of "marching ants" around your image. Go to Image>Adjustments>Curves and bring your curve down to add darkness at the desired level for the vignette shading. Click OK and Deselect.
You can always go back to the vignette layer to reduce the opacity of the vignette if you wish.
Voila'! You now have a vignette!


No comments:
Post a Comment